
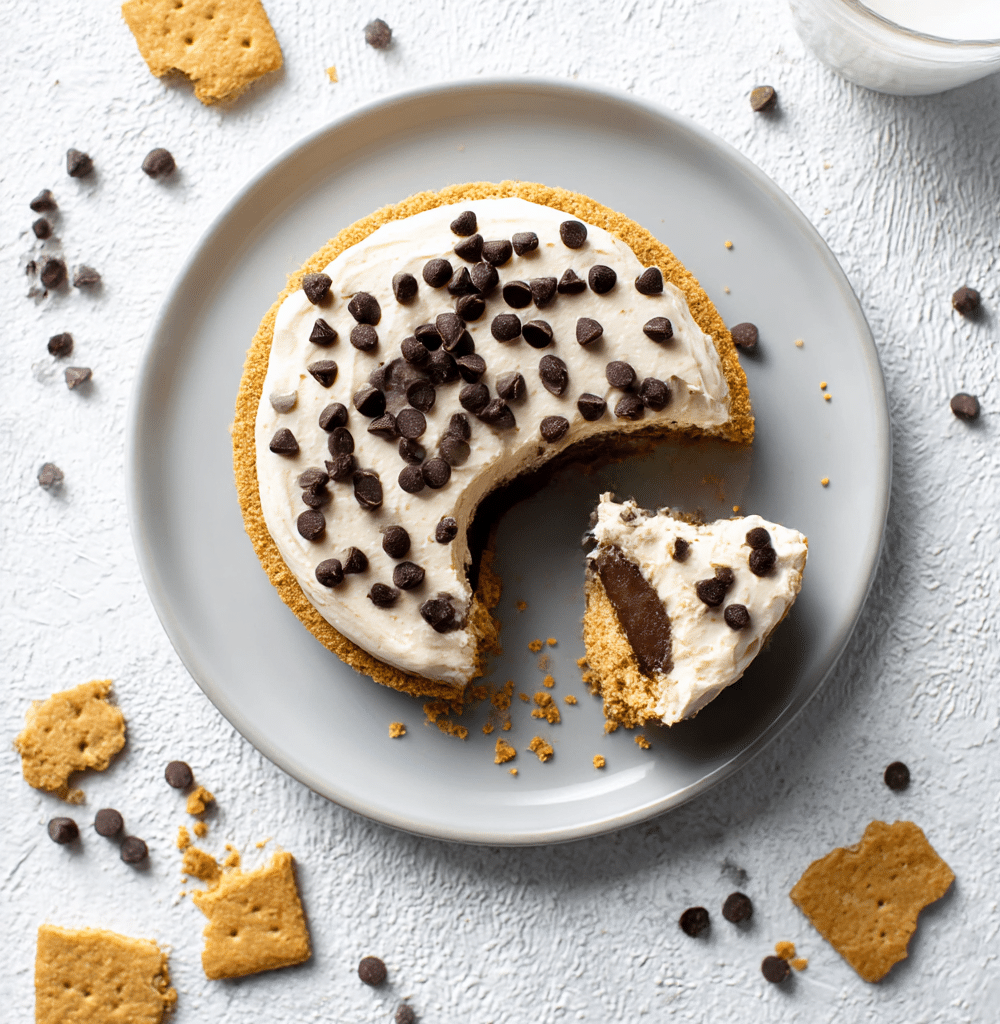
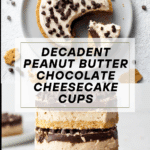
Peanut Butter Chocolate Cheesecake Cups Recipe
If you want a luscious, crowd-pleasing treat that perfectly balances sweetness, saltiness, and creamy decadence, say hello to Peanut Butter Chocolate Cheesecake Cups. These handheld desserts are a dream come true for peanut butter and chocolate lovers, offering a crispy graham cracker crust, rich chocolate layer, and a velvety cheesecake-inspired peanut butter filling. They freeze beautifully, look dazzlingly cute, and will disappear from any dessert tray in record time—trust me on this one!
Ingredients You’ll Need
Let’s keep things simple and flavor-focused! Each ingredient in Peanut Butter Chocolate Cheesecake Cups lends something special—whether it’s the crunch of the base, the glossy chocolate finish, or the creamy, tangy filling. Here’s what you’ll need and why each item matters:
- Graham crackers: These give the crust a warm, toasty crunch that stands up to all those luscious layers.
- Unsalted butter: Softened butter binds the graham crumbs and adds that essential buttery melt-in-your-mouth quality.
- Semi-sweet chocolate: A touch of bitter cocoa richness beautifully balances out the sweetness of the cups.
- Coconut oil: This ensures the chocolate melts luxuriously and sets with a shiny, silky snap.
- 4% cottage cheese: The secret ingredient for creamy, cheesecake-like texture—no one will ever guess!
- Creamy all-natural peanut butter: For the most robust peanut butter flavor and a classic, creamy filling.
- Honey: Adds a caramel note and keeps things naturally sweet (and wonderfully sticky in the best way).
- Flakey sea salt: A pinch intensifies chocolate and peanut butter flavors, and adds irresistible crunch.
- Mini chocolate chips: These finish the cups with melty, chocolatey bursts and a playful look.
How to Make Peanut Butter Chocolate Cheesecake Cups
Step 1: Prep the Pan
Begin by preheating your oven to 350ºF. Line a muffin tin with cupcake liners and generously coat each with nonstick cooking spray. This way, releasing your Peanut Butter Chocolate Cheesecake Cups later will be a breeze, and there’s no wrestling with stuck-on dessert!
Step 2: Make the Graham Cracker Crust
Bust out your food processor and blitz together the graham crackers and softened butter. A few pulses and you’ll have a crumbly, buttery mix. It’s this base that makes every bite start with a perfect, toasty crunch, so take a moment to appreciate the aroma!
Step 3: Form and Bake the Crust
Spoon about one tablespoon of the graham cracker mixture into each lined muffin cup. Use the back of your spoon to press the crumbs down firmly. A compact crust ensures your cups hold together when you’re ready for bite-sized bliss. Bake for five minutes—just long enough to set the crust and bring out the graham flavor—then let them cool completely.
Step 4: Prepare the Chocolate Layer
In a microwave-safe bowl, combine the chopped chocolate and coconut oil. Microwave in 20-second bursts, stirring in between, until the chocolate is completely smooth and velvety. This step makes your kitchen smell irresistible and ensures a glossy coating that hardens perfectly.
Step 5: Layer on the Chocolate
Spoon two heaping teaspoons of the melted chocolate over each crust and spread it out edge to edge. Pop the whole pan in the freezer for 10 minutes so the chocolate sets up nicely—this creates a distinct layer and keeps the other components from blending together.
Step 6: Blend the Peanut Butter Cheesecake Filling
Grab your food processor again and add cottage cheese, peanut butter, and honey. Blend on high for 2 to 4 minutes until completely smooth and thick. The result is a luscious filling with all the flavor of cheesecake, but with the nutty twist of peanut butter.
Step 7: Assemble the Cheesecake Cups
Scoop about 1.5–2 heaping tablespoons of the peanut butter cheesecake mixture onto the set chocolate crust in each liner. Gently spread to cover the chocolate layer. Sprinkle flakey sea salt and a playful pinch of mini chocolate chips on top—this is where they start looking irresistible!
Step 8: Freeze Until Firm
Transfer your filled muffin tin back into the freezer and freeze for at least 2 hours. The chilling time is crucial! It sets all the layers and makes unwrapping easy, giving you picture-perfect Peanut Butter Chocolate Cheesecake Cups every single time.
How to Serve Peanut Butter Chocolate Cheesecake Cups

Garnishes
A light scatter of flakey sea salt and extra mini chocolate chips adds sparkle and crunch, but feel free to try a few chopped roasted peanuts or a drizzle of extra melted chocolate if you’re feeling fancy! Even a dusting of cocoa powder or powdered sugar makes a lovely touch.
Side Dishes
For dessert spreads, serve your Peanut Butter Chocolate Cheesecake Cups with fresh raspberries or strawberries for tart contrast, or alongside a robust coffee or cold glass of milk. A scoop of vanilla bean ice cream or a dollop of whipped cream also pairs beautifully for those who love a little extra creamy luxury.
Creative Ways to Present
Pop the cups out of their liners and arrange them on a pretty dessert platter—layer them pyramid-style for a dramatic centerpiece. For parties, tuck each into mini parchment squares and place in decorative treat boxes. They also look adorable served in pastel liners at spring gatherings or with gold foil for the holidays!
Make Ahead and Storage
Storing Leftovers
These Peanut Butter Chocolate Cheesecake Cups hold their shape and flavor wonderfully in the fridge. Store them in an airtight container for up to 5 days—just make sure they’re arranged in a single layer, or separate with parchment to prevent sticking.
Freezing
For longer storage, these cups freeze like champs. After they’re fully set, seal them in an airtight, freezer-safe container (or tuck into a zip-top freezer bag). They’ll keep beautifully for up to 2 months. Let them sit at room temperature for a few minutes to soften before enjoying!
Reheating
No need for reheating here! In fact, Peanut Butter Chocolate Cheesecake Cups are ideal served straight from the fridge or after a short rest at room temperature. If you’ve frozen them, a 10–15 minute thaw on the counter is all you need for the perfect texture.
FAQs
Can I use low-fat cottage cheese instead of 4%?
Technically, yes! While low-fat cottage cheese does work, 4% offers a richer, creamier cheesecake-like result. If you swap for a lower fat version, expect the filling to be a touch less silky but still absolutely delicious.
How can I make these gluten-free?
Easy swap: substitute your favorite certified gluten-free graham crackers for the regular ones. The process and taste will be just as satisfying, so gluten-sensitive friends can fully enjoy them too!
Do I have to use coconut oil in the chocolate layer?
If coconut oil isn’t your thing, you can use a neutral oil like vegetable or canola. The main goal is to help the chocolate melt smoothly and create a shiny, snappy finish when it sets.
Can I substitute another nut butter?
Absolutely! Almond or cashew butter both work nicely and bring their own unique twist. Just make sure to use the all-natural, drippy kind for the best blendable texture in your cheesecake layer.
What’s the best way to transport them for a party or picnic?
Keep your Peanut Butter Chocolate Cheesecake Cups cold until serving. Stack them in a single layer in a sturdy container, and use freezer packs if the weather’s warm—they’ll stay delightfully intact and ready to wow your friends!
Final Thoughts
There’s something downright magical about the way Peanut Butter Chocolate Cheesecake Cups combine bold, classic flavors into one adorable, crave-worthy treat. Give this recipe a try—the hardest part will be waiting for them to chill, but every delicious bite will convince you it’s worth it!
Print
Peanut Butter Chocolate Cheesecake Cups Recipe
- Total Time: 2 hours 30 minutes
- Yield: 12 cheesecake cups 1x
- Diet: Vegetarian
Description
Indulge in these delightful Peanut Butter Chocolate Cheesecake Cups that offer a perfect blend of flavors in every bite. A luscious combination of creamy peanut butter, rich chocolate, and a hint of saltiness, these mini desserts are sure to satisfy your sweet cravings.
Ingredients
Graham Cracker Crust:
- 9 graham crackers (full sheets)
- 4 tablespoons unsalted butter (softened)
Chocolate Layer:
- 6 oz. semi-sweet chocolate (chopped (~¾ cup chocolate chips))
- 2 teaspoons coconut oil
Peanut Butter Cheesecake Layer:
- 10 oz. 4% cottage cheese*
- ⅓ cup creamy (all-natural peanut butter (we used Smucker’s All-Natural))
- ¼ cup + 1 tablespoon honey
Additional Toppings:
- Flakey sea salt
- Mini chocolate chips
Instructions
- Preheat the Oven and Prepare Muffin Tin: Preheat the oven to 350ºF and line a muffin tin with liners, spraying generously with nonstick cooking spray.
- Make Graham Cracker Crust: Process graham crackers and butter in a food processor until crumbly. Press a tablespoon of crumbs into each muffin cup.
- Bake Crust: Bake crust for 5 minutes at 350ºF, then cool.
- Prepare Chocolate Layer: Melt chocolate and coconut oil, then spread over crust and freeze briefly.
- Make Peanut Butter Cheesecake Layer: Blend cottage cheese, peanut butter, and honey until creamy. Spread over chocolate layer.
- Chill: Freeze cups for at least 2 hours to set.
Notes
- For a smoother texture, blend the peanut butter cheesecake layer longer.
- Adjust sweetness by adding more or less honey to taste.
- Prep Time: 20 minutes
- Cook Time: 5 minutes
- Category: Dessert
- Method: Baking, Freezing
- Cuisine: American
Nutrition
- Serving Size: 1 cheesecake cup
- Calories: 280
- Sugar: 15g
- Sodium: 190mg
- Fat: 17g
- Saturated Fat: 9g
- Unsaturated Fat: 6g
- Trans Fat: 0g
- Carbohydrates: 27g
- Fiber: 2g
- Protein: 6g
- Cholesterol: 15mg
Keywords: Peanut Butter Chocolate Cheesecake Cups, Mini Cheesecakes, Dessert Recipe