
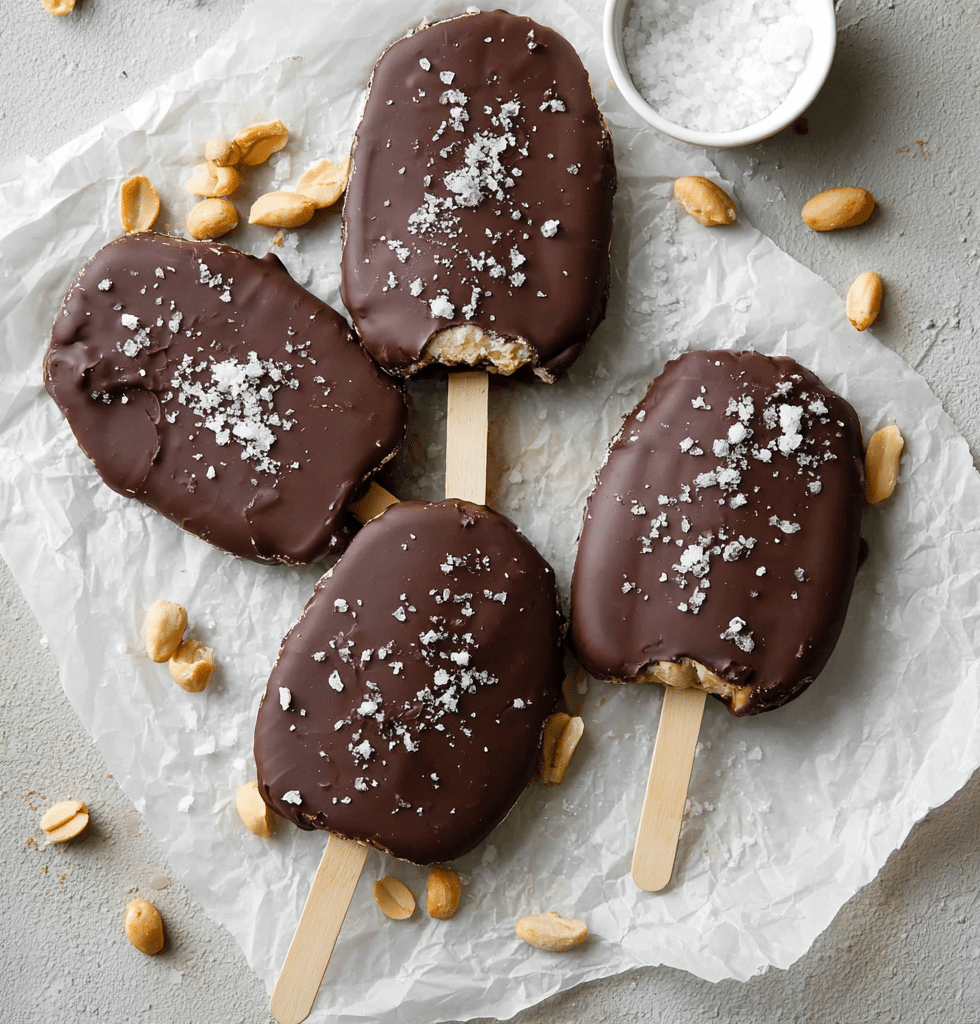
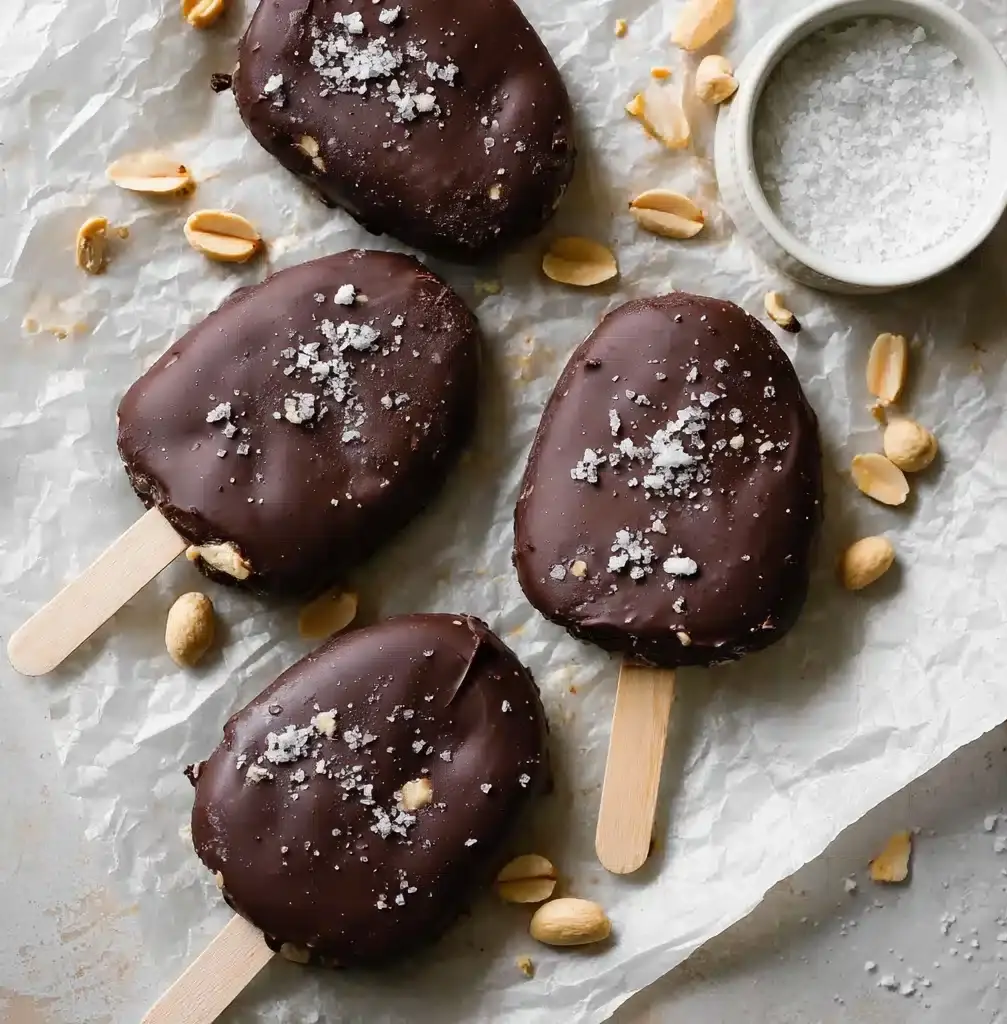
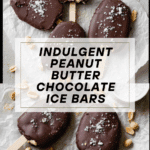
Healthy Buster Bars Recipe
If you’re on the hunt for a cool, creamy treat that feels indulgent but is secretly packed with goodness, you need to try Healthy Buster Bars. Inspired by the classic DQ favorite, these homemade bars are layered with rich peanut butter, crunchy nuts, and decadent chocolate—all without refined sugar or heavy cream. Whether you’re looking for a protein-rich snack, a guilt-free dessert, or a make-ahead treat for summer gatherings, these bars deliver on all fronts. They’re my go-to for satisfying that sweet tooth while keeping things wholesome, and I promise your friends and family will fall in love at first bite!
Ingredients You’ll Need
I love how this Healthy Buster Bars recipe relies on simple, everyday ingredients, each playing a crucial role in making the bars luscious, creamy, and full of flavor. Here’s what you need and why they matter:
- Vanilla Greek Yogurt: Forms the creamy base and adds a boost of protein and tangy sweetness.
- Peanut Butter: Adds richness, healthy fats, and that nutty flavor we all crave.
- Maple Syrup: Naturally sweetens the filling without any refined sugar.
- Vanilla Protein Powder: Pumps up the bars’ protein content and helps everything set.
- Lightly Chopped Peanuts: Lends a satisfying crunch and a salty contrast to the creamy filling.
- Chocolate Chips (optional): Gives extra bursts of chocolate—go ahead, treat yourself!
- Dark Chocolate Chips: Becomes that irresistible chocolate shell around your bars.
- Coconut Oil: Keeps the chocolate meltable and gives the coating a silky snap.
- Flaky Sea Salt (optional): Just a pinch brings all the flavors to life in each bite.
How to Make Healthy Buster Bars
Step 1: Mix the Filling
In a medium bowl, combine the vanilla Greek yogurt, peanut butter, maple syrup, and vanilla protein powder. Stir until the mixture is smooth and evenly blended—it should look creamy and light, with no streaks from the nut butter or powder. This base will set into a soft, almost nougat-y layer that you’ll dream about.
Step 2: Scoop Onto Baking Sheet
Line a baking sheet with parchment paper—you’ll be so glad you did when it’s time to remove your bars! Scoop 5 or 6 generous dollops of the yogurt mixture onto the sheet. Use a spoon to gently flatten each scoop into a thick, round disk. Try to keep the sizes similar so they freeze and coat evenly later.
Step 3: Add Toppings
Before you freeze, sprinkle the tops with chopped peanuts and a few chocolate chips if you’re feeling extra. The nuts add a delightful crunch, and the chocolate chips melt just slightly into the filling for pockets of extra flavor. This small step takes your Healthy Buster Bars to the next level!
Step 4: Freeze the Bars
Now for the magic—press a popsicle stick into the center of each bar, deep enough that it’ll hold once frozen. Slide the baking sheet into the freezer and let the bars chill for at least 30 minutes, or overnight if you’re prepping ahead. The filling will firm up enough to hold its shape but stay creamy.
Step 5: Melt the Chocolate
Combine the dark chocolate chips and coconut oil in a microwave-safe bowl. Microwave in 30-second bursts, stirring each time, for about 1 to 1.5 minutes or until smooth and glossy. The coconut oil ensures your chocolate is luscious and coats the bars beautifully—don’t skip it!
Step 6: Coat Bars In Chocolate
Gently remove each frozen bar from the parchment. Dip into the melted chocolate, using a spoon to cover every nook and cranny. The cold bars make the chocolate set almost instantly, forming a gorgeous crackly shell.
Step 7: Add Flaky Salt
Return each chocolate-coated bar to the baking sheet. If you love that sweet-salty combo, sprinkle a pinch of flaky sea salt on top while the chocolate is still soft—it’ll stick and elevate the final flavor.
Step 8: Freeze & Enjoy
Pop your Healthy Buster Bars back in the freezer for a final 15 minutes to set the chocolate. Then, it’s time to dig in! Keep a napkin handy: these are as fun to eat as they are to make.
How to Serve Healthy Buster Bars
Garnishes
Nothing finishes these bars quite like a flourish of extra peanuts or a dusting of flaky salt. If you’re feeling fancy, try a drizzle of warmed peanut butter or even a few cacao nibs for crunch. Garnishing not only makes each bar look inviting but gives your guests a hint of what’s inside.
Side Dishes
While these Healthy Buster Bars can easily steal the show solo, pairing them with fresh fruit—like sliced strawberries or banana coins—adds a bright, refreshing counterpoint. For a party, serve alongside a platter of berries or a light green salad to balance their creamy richness.
Creative Ways to Present
Turn your freezer treats into a centerpiece by serving bars upright in a cup of crushed ice, or arrange them in colorful paper wrappers for a festive look. For a fun twist, cut the bars into smaller pieces and serve as “mini” bites at a dessert buffet or picnic.
Make Ahead and Storage
Storing Leftovers
These Healthy Buster Bars are freezer-friendly by design. Store leftovers in a tightly sealed container or freezer bag. Layer parchment between bars to keep them from sticking. They’ll stay delicious for up to two weeks—although I doubt they’ll last that long!
Freezing
The best part? You can make Healthy Buster Bars ahead of time and keep them on hand for whenever cravings strike. Once set, keep the bars in the back of your freezer where the temperature is most stable for long-lasting creaminess.
Reheating
No need to reheat! Just let the bars sit at room temperature for 2–3 minutes before enjoying. This softens the yogurt layer and ensures the chocolate is just the right amount of snappy and melt-in-your-mouth. Perfect for instant treat satisfaction!
FAQs
Can I use a different nut butter?
Absolutely! Almond butter or cashew butter both work beautifully if you prefer a different flavor or need to accommodate allergies. Just be sure to use a creamy variety for the smoothest filling.
Are Healthy Buster Bars gluten-free?
Yes, as long as your protein powder and chocolate chips are certified gluten-free, these bars contain no gluten-containing ingredients. Always check your labels if you’re sensitive!
What if I don’t have popsicle sticks?
No worries—you can use sturdy toothpicks, wooden coffee stirrers, or even just enjoy the bars as hand-held rounds. The stick just makes them more fun and easier for little hands.
Can I make these vegan?
You sure can! Swap in your favorite dairy-free Greek yogurt, use a vegan protein powder, and double-check that your chocolate chips are vegan. The results will still be creamy, decadent, and plant-based.
How can I make them sweeter or less sweet?
It’s super easy to tweak the sweetness: add a bit more maple syrup for extra sweetness, or reduce the amount for a more subtle taste. If you love dark chocolate, you might even skip the chocolate chips on top for a more intense, less sweet bite.
Final Thoughts
I genuinely can’t encourage you enough to whip up a batch of these Healthy Buster Bars—they’re unbelievably simple, satisfy every dessert craving, and feel just a little bit magical with their creamy, crunchy, chocolatey layers. Give them a try and let them brighten up your snack time or next gathering. You might just discover your new favorite freezer treat!
Print
Healthy Buster Bars Recipe
- Total Time: 1 hour
- Yield: 6 bars 1x
- Diet: Vegetarian
Description
These Healthy Buster Bars are a delicious and nutritious treat that you can enjoy guilt-free. Creamy vanilla Greek yogurt, rich peanut butter, and a touch of maple syrup come together to create a satisfying filling, while a decadent dark chocolate coating adds the perfect amount of sweetness. Topped with crunchy peanuts and optional chocolate chips, these bars are a delightful snack for any time of day.
Ingredients
Filling:
-
- 3/4 cup vanilla Greek yogurt
- 1/4 cup peanut butter
- 1 teaspoon maple syrup
- 2 Tablespoons vanilla protein powder
- 2 Tablespoons lightly chopped peanuts
- 1 Tablespoon chocolate chips (optional)
Coating:
- 1 cup dark chocolate chips
- 1 Tablespoon coconut oil
- pinch flaky sea salt (optional)
Instructions
- Mix Filling – In a mixing bowl, combine the yogurt, peanut butter, maple syrup, and protein powder until smooth.
- Scoop Onto Baking Sheet – Place dollops of the mixture onto a parchment-lined baking sheet and flatten into rounds.
- Add Toppings – Sprinkle each round with chopped peanuts and chocolate chips if desired.
- Freeze – Insert popsicle sticks into each round and freeze for at least 30 minutes or overnight.
- Melt Chocolate – Microwave the dark chocolate chips and coconut oil, stirring every 30 seconds until melted.
- Coat Bars In Chocolate – Dip each frozen bar into the melted chocolate to coat.
- Add Flaky Salt – Sprinkle flaky sea salt over the chocolate-coated bars if using.
- Freeze & Enjoy – Freeze the bars for an additional 15 minutes before serving.
Notes
- You can customize these bars by adding different toppings like dried fruit or shredded coconut.
- Store any leftovers in an airtight container in the freezer for up to a month.
- Prep Time: 15 minutes
- Cook Time: 2 minutes
- Category: Dessert
- Method: Freezing
- Cuisine: American
Nutrition
- Serving Size: 1 bar
- Calories: 220
- Sugar: 12g
- Sodium: 80mg
- Fat: 14g
- Saturated Fat: 8g
- Unsaturated Fat: 5g
- Trans Fat: 0g
- Carbohydrates: 18g
- Fiber: 3g
- Protein: 8g
- Cholesterol: 5mg
Keywords: Healthy, Buster Bars, Snack, Dessert, Yogurt, Peanut Butter, Chocolate
