
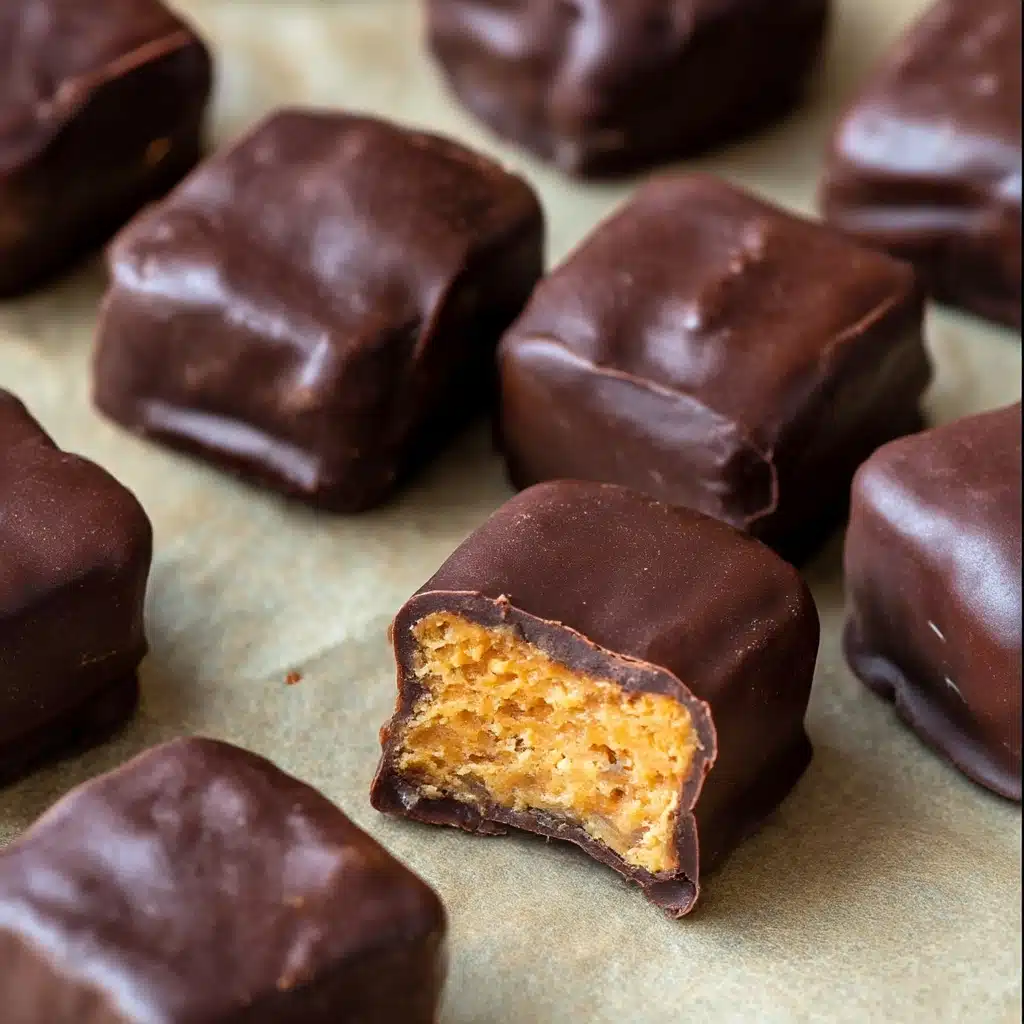
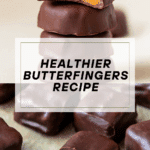
Healthier Butterfingers Recipe
If you adore classic candies but want a mindful twist, these Healthier Butterfingers will absolutely delight you! They capture all the nostalgic crunch and peanutty-chocolate magic you remember, but with simple, wholesome ingredients and a breeze of a method. This is the recipe you pull out when you’re craving something sweet but still want to stick to your feel-good kitchen goals. Trust me, if you’ve got a soft spot for old-school treats, making these at home is a total gamechanger—you’ll never look at the storebought version the same way again!

Ingredients You’ll Need
There’s something extra special about how the simplest ingredients can transform into something spectacular. Each star of this Healthier Butterfingers recipe is absolutely essential for bringing out the unique flavor, crispy texture, and irresistible look of these homemade candy bites.
- Organic Corn Flakes: These give that iconic, shattering crunch—crush them finely for the best texture.
- Drippy Peanut Butter: The creamy, runny kind binds everything together and brings that signature nutty flavor.
- Maple Syrup: Natural sweetness and a lovely depth that balances perfectly with the saltiness of the peanut butter.
- Molasses (optional): Just a teaspoon deepens the caramel notes, making these Healthier Butterfingers even more special.
- Chocolate Chips: Go for dark or semi-sweet for a rich shell that doesn’t overwhelm the inner crunch.
- Coconut Oil: This helps the chocolate melt smoothly and makes for a glossy, snappy coating.
How to Make Healthier Butterfingers
Step 1: Crush Your Corn Flakes
Start by placing your corn flakes in a small lunch-size plastic bag. Seal it tightly (no mess, please!) and use your hands or a rolling pin to crush the flakes into small, uneven pieces. You don’t want powder, just loads of jagged, bite-sized shards. This step is key for giving Healthier Butterfingers that authentic, toothsome middle that everyone loves.
Step 2: Warm the Peanut Butter Mixture
Grab a small saucepan and add your drippy peanut butter, maple syrup, and molasses if you’re using it. Set it over low-medium heat. Stir gently as everything begins to meld into a silky, glossy mixture. Keep an eye—don’t let it bubble or boil. The goal is just to smoothly combine these ingredients without scorching any peanut goodness.
Step 3: Fold in the Corn Flakes
Once your gooey peanut butter concoction is ready, take it off the heat. Pour in the crushed corn flakes and use a sturdy spatula or spoon to fold everything together. Ensure every flake gets coated—this is the backbone of your Healthier Butterfingers, so mix well but work gently to keep some crunch.
Step 4: Pack Mixture Into a Mold
With your mixture ready, spoon it into a silicone ice cube tray, filling each cavity about halfway. Press down gently with the back of your spoon to pack the mixture snugly. This is what gives your Healthier Butterfingers their shape and makes popping them out so satisfying later!
Step 5: Freeze to Set
Transfer the filled tray into your freezer. Patience is key—let the bites chill for at least 2 hours. This step helps solidify the structure, making sure your Healthier Butterfingers hold together perfectly when you dip them in chocolate later.
Step 6: Melt the Chocolate
Once your bites are firm, it’s time for the chocolate magic. Combine chocolate chips and coconut oil in a microwave-safe bowl. Heat in 15-second bursts, stirring well between each, until smooth and glossy. It usually takes just 1 to 2 minutes—don’t rush, and don’t let the chocolate get too hot or it may seize.
Step 7: Coat Each Bite
Pop your frozen butterfinger centers out onto a parchment-lined platter. Dip each one into the melted chocolate, using a spoon to ensure every corner gets a thick, luscious coat. Set them back on the parchment after dipping. This step is both fun and a little messy—the best kitchen adventures always are!
Step 8: Final Freeze
Once all the bites are coated, back into the freezer they go. Just give them 10-20 minutes to let the chocolate harden. That crisp shell is the finishing touch for truly authentic-tasting Healthier Butterfingers.
Step 9: Storing the Bites
When the chocolate is set, pop your delicious candy bites into an airtight container and keep them in the freezer. Enjoy them right from the cold—they’re extra snappy and stay perfect for weeks!
How to Serve Healthier Butterfingers
Garnishes
For a little pizzazz, drizzle your Healthier Butterfingers with extra melted chocolate or scatter a few flakes of sea salt on top before the chocolate sets. Chopped roasted peanuts or a pinch of cacao nibs add even more crunch and make each bite picture-worthy.
Side Dishes
The sweet-salty magic of these bites pairs beautifully with a scoop of creamy Greek yogurt or served alongside a bowl of fresh berries. If you’re feeling extra fancy, try them crumbled over a vanilla smoothie bowl for a healthy-ish dessert upgrade!
Creative Ways to Present
Get playful with presentation! Stack bites high on a pretty cake stand for parties, tuck into mini paper cups for lunchboxes, or gift bundles of Healthier Butterfingers in cellophane bags tied with a ribbon. They’re a hit in any context and make for charming edible gifts.
Make Ahead and Storage
Storing Leftovers
Keep your Healthier Butterfingers stored in a freezer-safe airtight container. This not only preserves their shape and texture, but also ensures they stay delightfully crisp for snacking—or sharing—whenever the craving strikes.
Freezing
These treats really shine when enjoyed straight from the freezer. They’ll keep perfectly for up to 1–2 months, making them ideal for meal prepping or last-minute dessert needs. Just layer with parchment paper if you’re stacking, so they don’t stick together.
Reheating
No reheating required—these Healthier Butterfingers are made to enjoy chilled! If you prefer a slightly softer texture, let them sit at room temperature for 5-10 minutes before biting in, but don’t leave them out too long or the chocolate may lose its snap.
FAQs
Can I use a different nut butter instead of peanut butter?
Absolutely! Almond or cashew butter can step in beautifully—just be sure to use a runny variety for that perfect mix-and-bind effect. The flavor will shift, but you’ll still get deliciously nutty, Healthier Butterfingers-style results.
Are these gluten-free?
They can be—look for certified gluten-free corn flakes to be certain. Always check the labels for cross-contamination if you’re serving to someone with celiac disease.
Is there a substitute for coconut oil?
Yes! You can use a tiny bit of butter or even vegetable oil to help the chocolate melt smoothly if you don’t have coconut oil on hand. The purpose is just to achieve a shiny, easily dip-able coating.
What if I don’t have a silicone ice cube tray?
No tray? No problem! Line a small pan with parchment and press the mixture flat, then freeze and cut into squares before dipping. You’ll still get bite-sized Healthier Butterfingers with all the same satisfying crunch.
Can I add anything else to the filling?
Get creative! A sprinkle of chia seeds, crispy rice, or a dash of cinnamon in the filling can add a personal twist. As long as the ratios stay close, your Healthier Butterfingers will hold together perfectly.
Final Thoughts
These Healthier Butterfingers are truly one of those recipes you’ll find yourself making on repeat. Sharing them always sparks big smiles, and even the skeptics will be wowed by their spot-on flavor! I can’t wait for you to try making a batch and discover just how easy and fun homemade candy can be.
Print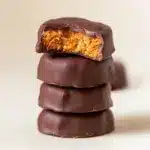
Healthier Butterfingers Recipe
- Total Time: 2 hours 30 minutes
- Yield: 12 pieces 1x
- Diet: Vegetarian
Description
These homemade Healthier Butterfingers are a delightful treat that you can feel good about indulging in. Made with organic cornflakes, peanut butter, and maple syrup, these bites are coated in rich chocolate for a perfect balance of flavors.
Ingredients
For the Butterfingers:
- 1 1/2 cups organic corn flakes
- 3/4 cup drippy peanut butter
- 1/3 cup maple syrup
- 1 teaspoon molasses (optional)
For the Chocolate Coating:
- 1/2 cup chocolate chips
- 1 teaspoon coconut oil
Instructions
- Crush cornflakes: Place cornflakes in a small lunch-size plastic bag and crush into small pieces.
- Heat peanut butter: Add peanut butter, maple syrup, and molasses (if using) to a small saucepan over low-medium heat. Heat, while stirring until the mixture is combined. Don’t overheat or you’ll risk scorching the peanut butter.
- Combine with cornflakes: Once well combined, remove from heat and stir in crushed cornflakes.
- Fill ice cube tray: Spoon coated cornflakes into a silicone ice cube tray, filling each cavity about halfway.
- Freeze: Place ice cube tray in the freezer for bites to harden for at least 2 hours.
- Melt chocolate: Once bites have hardened, place chocolate and coconut oil in a microwave-safe bowl and melt in the microwave in 15-second increments, stirring between each.
- Coat in chocolate: Dip/coat each bite into the melted chocolate, one at a time. Use a spoon to coat until completely covered. Place on a platter lined with parchment.
- Set: Freeze the coated bites to let the chocolate harden.
- Storage: Keep the Butterfingers stored in the freezer in an airtight container for 1-2 months. Enjoy straight from the freezer.
- Prep Time: 15 minutes
- Cook Time: 5 minutes
- Category: Dessert
- Method: Freezing, Melting, Mixing
- Cuisine: American
Nutrition
- Serving Size: 1 piece
- Calories: 140
- Sugar: 9g
- Sodium: 65mg
- Fat: 8g
- Saturated Fat: 3g
- Unsaturated Fat: 4g
- Trans Fat: 0g
- Carbohydrates: 15g
- Fiber: 1g
- Protein: 3g
- Cholesterol: 0mg
Keywords: Healthier Butterfingers, Homemade Butterfingers, Chocolate Peanut Butter Treats