
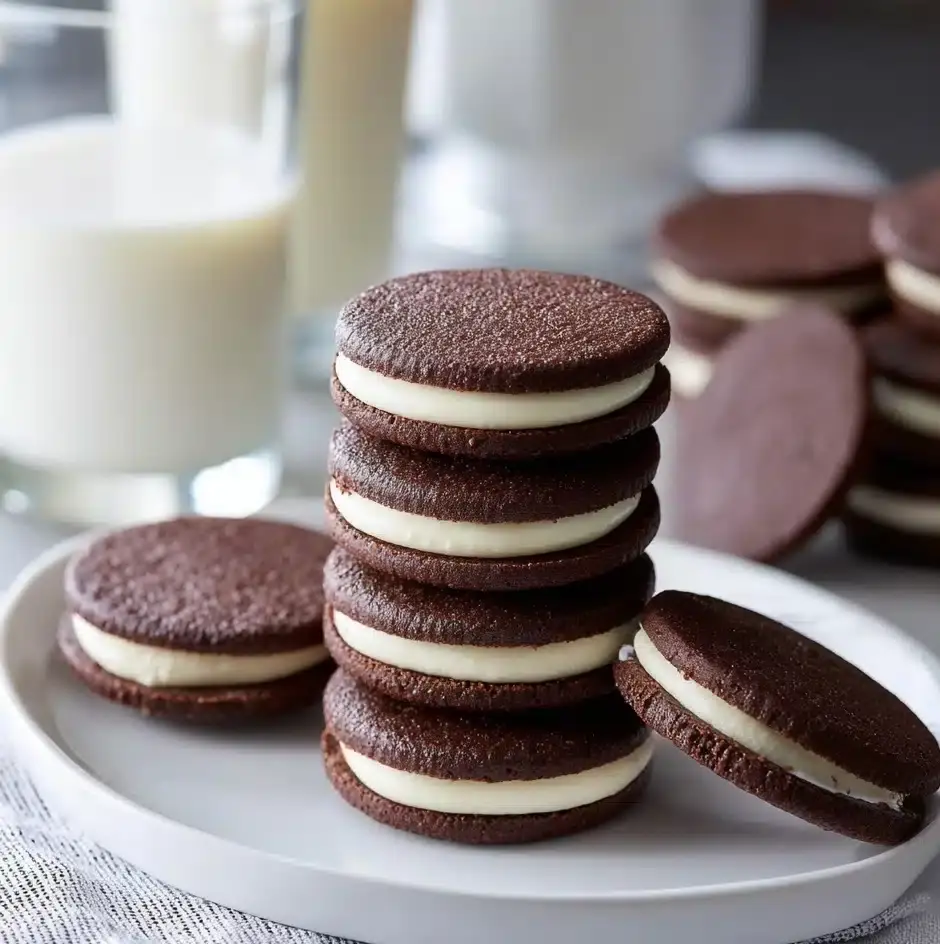
Homemade Oreos Recipe
If you’ve ever dreamed of biting into that perfect, nostalgic chocolate sandwich cookie, then you’re in for a treat with this recipe for Homemade Oreos. These luscious cookies marry a rich, cocoa-packed biscuit with a creamy, dreamy vanilla buttercream filling that you pipe yourself, giving you ultimate control over sweetness and texture. Making Homemade Oreos from scratch is surprisingly straightforward and so rewarding — they taste fresher and more decadent than the store-bought ones, plus you get the fun of customizing the filling just the way you like it. Get ready to impress friends and family with this classic American favorite turned homemade delight.
Ingredients You’ll Need
These ingredients are simple and pantry-friendly, but each one plays a vital role in making your Homemade Oreos perfectly balanced. From the butter creating that melt-in-your-mouth texture to cocoa powder giving the cookies their signature bold flavor, every component counts.
- Unsalted butter (1 1/2 cups, softened): Provides richness and tender texture to both cookies and filling.
- Sugar (3/4 cup): Adds sweetness and helps achieve the right cookie crispness.
- Dark brown sugar (3/4 cup): Offers a subtle molasses undertone that deepens flavor.
- Egg (1): Binds ingredients together and enriches the dough.
- All-purpose flour (1 2/3 cups): The sturdy base for the cookie structure.
- Cocoa powder (2/3 cup): Gives those classic, intense chocolate notes.
- Salt (1 teaspoon): Enhances all the flavors and balances sweetness.
- Baking soda (1/2 teaspoon): Helps cookies rise slightly for a tender crumb.
- Confectioners’ sugar (2 cups): Sweetens the creamy buttercream filling perfectly.
- Milk (1 tablespoon): Adds smoothness and helps reach the right frosting consistency.
- Vanilla extract (1/2 teaspoon): Brightens the filling with a warm, aromatic note.
- Kosher salt (1/2 teaspoon): A pinch in the buttercream for depth and balance.
How to Make Homemade Oreos
Step 1: Prepare the Cookie Dough
Start by creaming together the softened butter, sugar, and dark brown sugar in a stand mixer fitted with the paddle attachment. Beat on medium-high speed until the mixture turns light and fluffy — this usually takes about 3 to 5 minutes and is key for tender cookies. Then, add the egg and mix again to incorporate it smoothly.
Step 2: Add Dry Ingredients
Next, sift together the all-purpose flour, cocoa powder, salt, and baking soda. Add these dry ingredients slowly to the butter mixture and mix on low speed until just combined and no pockets of flour remain. This gentle mixing ensures your dough stays tender, so resist the urge to overwork it!
Step 3: Roll and Chill the Dough
Divide the dough in half, then place each half between two sheets of parchment or wax paper. Roll out the dough evenly to about one-eighth inch thickness. This thin layer is what creates the perfect, delicate bite of your cookies. Pop the rolled dough into the fridge for 30 to 40 minutes to firm up — this step prevents spreading during baking and keeps your cookies nice and crisp.
Step 4: Cut and Bake
Preheat your oven to 350 degrees Fahrenheit. Using a 1 1/2-inch round cookie cutter, cut circles from the chilled dough. Place them on a parchment-lined baking sheet with about an inch of space in between each cookie. Bake for 12 to 14 minutes or until the cookies are set and the edges begin to brown. Once done, transfer them to a cooling rack to cool completely before filling.
Step 5: Make the Buttercream Filling
While your cookies cool, it’s time to whip up the luscious vanilla buttercream filling. In your stand mixer, beat softened butter until it’s smooth and light. Gradually add the confectioners’ sugar in two parts, mixing slowly to avoid a sugar cloud, then increase speed to fully incorporate. Add the milk, vanilla extract, and kosher salt, and beat on medium speed for another 1 to 2 minutes until your filling is silky and fluffy.
Step 6: Assemble Your Homemade Oreos
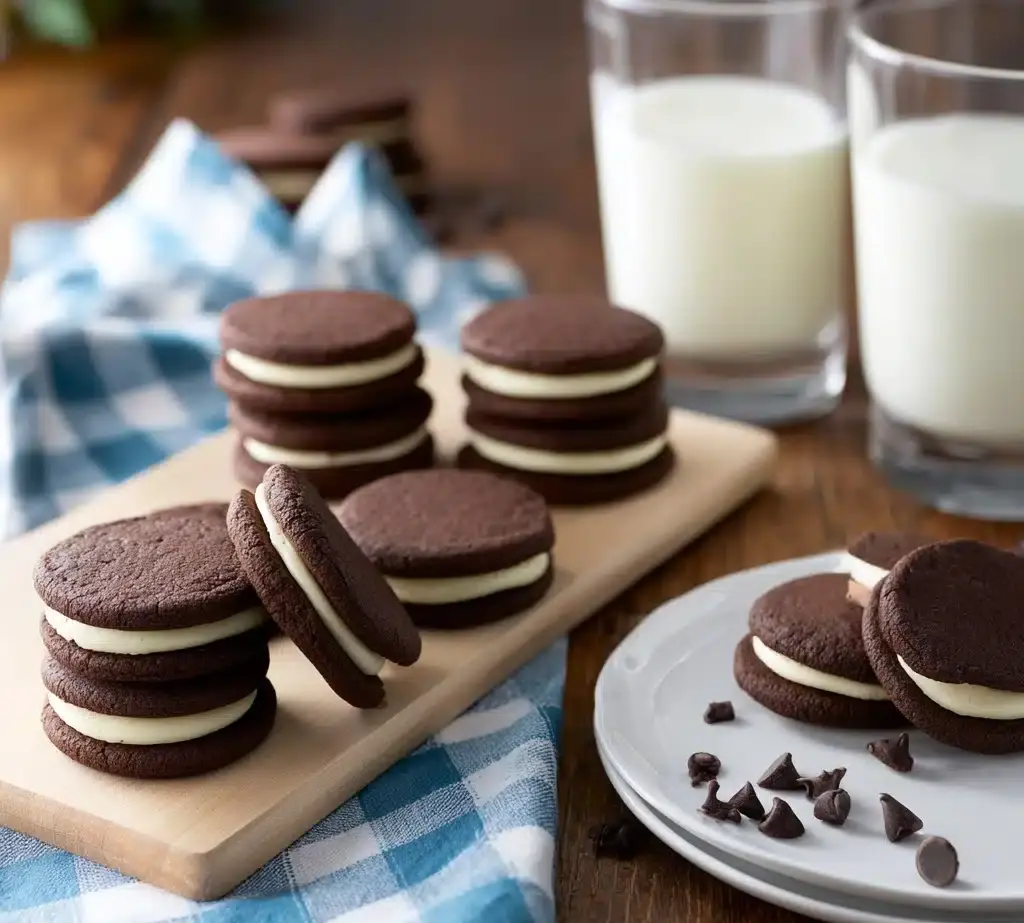
Transfer the frosting to a piping bag fitted with a large round tip for precision. Pipe a generous dollop onto the bottoms of half your cooled cookies, then sandwich them with the remaining cookie halves, pressed bottom-side to bottom-side. This is the best part, seeing those classic Oreo layers come together in your kitchen.
How to Serve Homemade Oreos
Garnishes
Want to elevate your Homemade Oreos? Lightly dust them with cocoa powder or a sprinkle of powdered sugar for a finished look. For crunchy fun, dip the edges in melted chocolate or crushed nuts. It adds both texture and visual appeal perfect for parties or gifts.
Side Dishes
Homemade Oreos pair beautifully with cold milk — whether classic dairy or a plant-based alternative. They also make a delightful companion to rich coffee or hot chocolate, turning snack time into a little indulgent ritual. For adults, try serving them alongside a scoop of vanilla ice cream for an easy dessert upgrade.
Creative Ways to Present
For an eye-catching presentation, arrange your Homemade Oreos on a decorated plate with colorful sprinkles or edible flowers. You can also stack them in clear jars as a gift or use them as a decadent garnish on cupcakes and milkshakes. The possibilities to get playful with presentation are endless!
Make Ahead and Storage
Storing Leftovers
You can store your Homemade Oreos in an airtight container at room temperature for up to a week. Keeping them sealed prevents any moisture from softening the cookies, so they stay crisp and delicious.
Freezing
If you want to keep these treats longer, they freeze beautifully. Stack the sandwiches between parchment paper in a freezer-safe container. When ready to enjoy, thaw them overnight in the fridge for an as-close-as-possible fresh-out-of-the-oven experience.
Reheating
Oreos are best enjoyed fresh or at room temperature, but if you prefer them slightly warm, pop them in a microwave for about 10 seconds. This softly melts the filling just a touch, making for a cozy, gooey bite.
FAQs
Can I use a different type of cocoa powder?
Yes! Dutch-processed cocoa powder will give your cookies a smoother, less acidic flavor and a darker color, while natural cocoa powder is more robust and slightly tangy. Both work well, but Dutch-processed is closer to classic Oreo taste.
Is it necessary to chill the dough before baking?
Chilling the dough helps prevent the cookies from spreading too much in the oven, ensuring they keep their perfect round shape and crisp edges. Skipping this step can lead to flatter, less structured cookies.
Can I make the filling vegan or dairy-free?
Absolutely! Replace the butter with a plant-based alternative and use a non-dairy milk like almond or oat milk. The texture and flavor might be slightly different but still delicious.
How do I store these cookies if I want to make them days in advance?
Keep the baked cookies and the filling separate until ready to assemble. Store the cookies in an airtight container at room temperature and the buttercream in the fridge. Assemble just before serving for the freshest taste.
Can I add flavors to the filling?
Yes, get creative! Add a teaspoon of peppermint extract, a pinch of cinnamon, or even matcha powder to the buttercream for a fun twist on your Homemade Oreos. Just adjust sweetness as needed.
Final Thoughts
Making your own Homemade Oreos is a joyful kitchen adventure that delivers rewards with every bite. Whether you’re baking for a family treat, a party, or simply your own sweet tooth, these cookies bring timeless comfort with a homemade touch. So gather your ingredients, roll up your sleeves, and prepare to fall in love with the chocolatey, creamy goodness that only freshly made homemade Oreos can offer!
Print
Homemade Oreos Recipe
- Total Time: 1 hour 10 minutes
- Yield: About 24 sandwich cookies 1x
- Diet: Vegetarian
Description
This Homemade Oreos recipe lets you create delicious, classic cream-filled chocolate sandwich cookies from scratch. With a rich cocoa cookie base and a smooth, sweet buttercream filling, these cookies are perfect for satisfying your Oreo cravings with fresh, homemade goodness.
Ingredients
Cookie Dough
- 1 cup unsalted butter, softened
- 3/4 cup sugar
- 3/4 cup dark brown sugar
- 1 egg
- 1 2/3 cups all-purpose flour
- 2/3 cup cocoa powder
- 1 teaspoon salt
- 1/2 teaspoon baking soda
Buttercream Filling
- 3/4 cup unsalted butter, softened
- 2 cups confectioners’ sugar
- 1 tablespoon milk
- 1/2 teaspoon vanilla extract
- 1/2 teaspoon kosher salt
Instructions
- Prepare the dough: In the bowl of a stand mixer fitted with the paddle attachment, combine 1 cup softened unsalted butter, sugar, and dark brown sugar. Beat at medium-high speed for about 3-5 minutes until the mixture is light and fluffy.
- Add the egg: Beat in the egg until fully incorporated.
- Mix dry ingredients: Add the all-purpose flour, cocoa powder, salt, and baking soda to the butter mixture. Mix on low speed until just combined and no traces of flour remain.
- Roll out the dough: Divide the dough in half. Roll out each half between two pieces of parchment or wax paper to a thickness of 1/8 inch.
- Chill the dough: Refrigerate the rolled dough for 30-40 minutes to firm up.
- Preheat the oven: Set your oven to 350°F (177°C).
- Cut cookies: Use a 1 1/2-inch round cookie cutter to cut circles from the chilled dough.
- Arrange for baking: Place the dough circles on a parchment-lined baking sheet, spacing them at least 1 inch apart.
- Bake the cookies: Bake for 12-14 minutes, or until the cookies are set and start to brown around the edges.
- Cool: Remove cookies from the baking sheet and transfer to a cooling rack to cool completely.
- Repeat: Repeat steps 7-10 for the remaining dough.
- Make the buttercream: In a clean mixer bowl, beat 3/4 cup softened unsalted butter until light and smooth. Gradually add half of the confectioners’ sugar, beating slowly. Add the remaining sugar and incorporate fully.
- Flavor the frosting: Add milk, vanilla extract, and kosher salt to the buttercream and beat on medium speed for 1-2 minutes until smooth and creamy.
- Pipe the frosting: Transfer the frosting to a piping bag fitted with a large round tip.
- Assemble: Pipe a layer of filling onto the bottom side of one cookie, then sandwich with another cookie, bottom sides together. Press gently to spread the filling evenly.
Notes
- Make sure the butter is softened but not melted for best mixing results.
- Chilling the dough helps prevent spreading and gives cleaner cookie shapes.
- The cookies should be completely cooled before assembling to prevent the filling from melting.
- You can store the assembled cookies in an airtight container at room temperature for up to 3 days or in the refrigerator for up to a week.
- For an extra touch, dust the cookies with a little powdered sugar before serving.
- Prep Time: 20 minutes
- Cook Time: 14 minutes
- Category: Dessert, Snack
- Method: Baking
- Cuisine: American
Nutrition
- Serving Size: 2 sandwich cookies
- Calories: 260
- Sugar: 20g
- Sodium: 130mg
- Fat: 14g
- Saturated Fat: 8g
- Unsaturated Fat: 5g
- Trans Fat: 0g
- Carbohydrates: 32g
- Fiber: 2g
- Protein: 3g
- Cholesterol: 25mg
Keywords: homemade oreos, chocolate sandwich cookies, homemade cookies, oreo recipe, buttercream filling


